 |
|
The purpose of this short article is to present step by step construction techniques aimed at producing reasonably good looking models of U.S. twin and quad 40 mm emplacements and British quad and octuple barrel pom-poms of WW2 vintage.
Four Barrel British Pom-Poms - There are a number of good reference works which have plan/profile shots of British pom-poms, from which you can take reference measurements. Generally, I make the base for the four barrel pom-pom 0.12" square, with the back corners rounded off. I use two ply Bristol Board for the base, one ply BB for the shields, balsa for the gun housing, plastic rod and strip for the ammo containers, and 0.006" brass wire (from your local train shop) for the gun barrels.
| Click to Enlarge Quad RN Pom-Poms |
|
 |
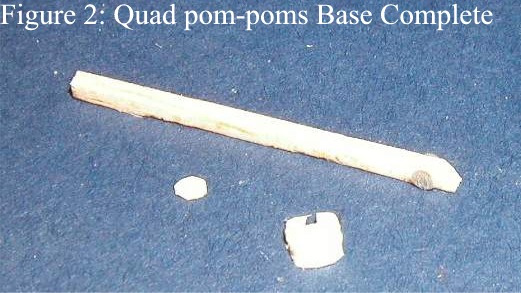 |
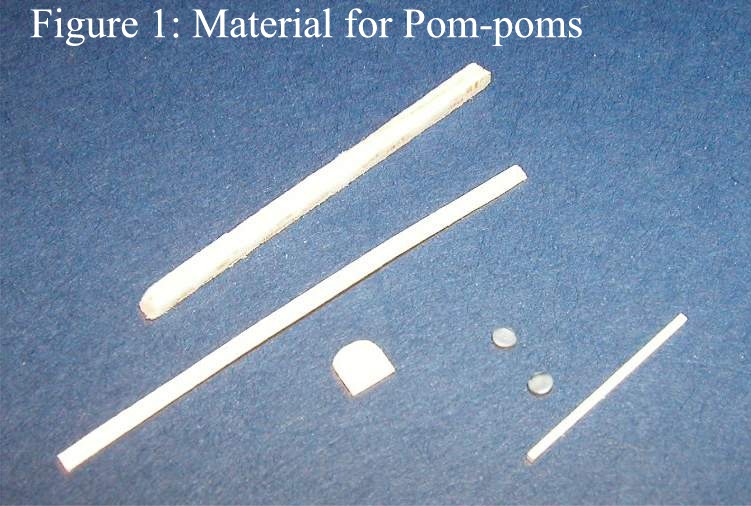
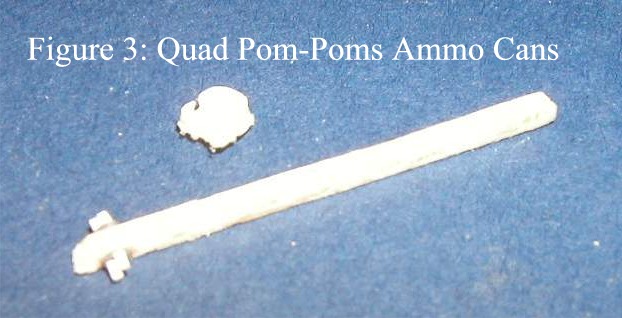
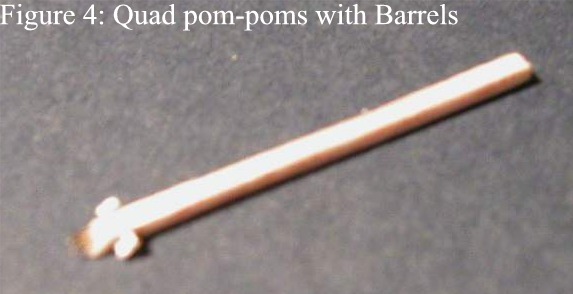
Figure One shows the materials laid out. The balsa for the gun receiver is approximately 0.05" high by 0.06" wide. Start by cutting out your base, rounding the rear corners, and applying the shields using the lightweight BB cut in strips 0.04-0.05" wide, glued to the base with white glue. When you get done you will have a rather open base and shielding. Add at this point or later on a turntable using two-ply BB (one or two layers depending on how high off the deck it is mounted). Figure Two shows the base completed with the balsa strip beveled on the end and two disks cut from 0.050" diameter plastic rod glued to the strip using CA-glue. The ammo cans will be attached to the disks. Figure Three shows the ammo cans glued to the disks. The cans are made from 0.020 x 0.020" plastic strip. The rear can is higher than the front can, as your reference material will show. Now, using a straight pin, make marks on the beveled face of the strip with cans for the barrels. Cut 0.006" brass wire to a length of about 0.010" and press into the face. The upper guns fit further back on the face, so they look "shorter", though they are not. Glue with a drop of CA-glue when you have adjusted the guns to their final position. Now, cut the balsa strip off just behind the ammo cans, bevel the rear face slightly, and sand the cans to a tolerable length in plan view. Figure Four The housing has to fit on your base, remember. Glue it to the base and you are done. Figure Five shows the result after painting it a dark gray so that the camera would "recognize" it and focus on it.
| Click to Enlarge Quad RN Pom-Poms |
||
 |
 |
|
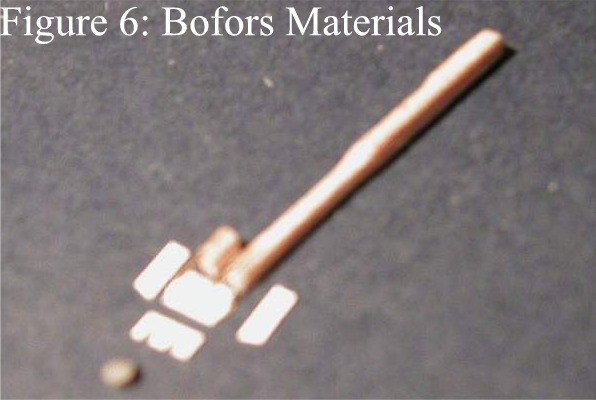
U. S. Quad 40mm Emplacement With Shield - The quad 40mm mounting is a bit more daunting than the pom-pom, but can be made fairly easily. The basic dimension of the base is 0.04" x 0.008", with the ends beveled slightly (too much beveling produces a result you would just as soon throw away—been there, done that). Make the shields out of 0.04 – 0.05" wide strips of one-ply BB or good quality card stock. Note that you can make the end pieces out of two pieces of BB or card stock or one piece bent to shape. Blue the end shield pieces to the base. Note that the front of the side shields is slightly beveled in profile view. Again, don’t overdo this or the result will look poor. For the front of the shield, cut a piece of cardstock strip to length and make two "slots" in the top edge for the guns. Use a very sharp #11 blade or razor blade for this. Be prepared mentally to do it more than once until the desired result is achieved. Figure Six shows the component parts laid out with the guns/receivers (which had already been prepared). Figure Seven is rather blurry, but shows the finished shield and base. The guns are glued to balsa strip. Use a strip 0.04" x 0.05", with the end slightly beveled. Cut the guns from 0.006" brass wire to a length of about 0.12" and glue two guns to the TOP EDGE of the balsa strip. I recommend you use white glue as you need to "adjust" these pieces of wire painstakingly before the glue hardens. The guns should stick out about 0.08" or whatever you find most realistic. When dry, cut the strip off just behind the wires and glue to the finished base/shield. Figure Eight shows the end result, painted as before to help the camera to focus.
| Click to Enlarge Quad 40mm Bofors |
||
 |
 |
|
Other Installations - To make unshielded 40mm quads, make your base and guns and forget about the shields. Much simpler. Same goes for the unshielded twin 40mm. For the unshielded quad or twin, you may want to add some tiny bits of "fiddly" stuff to the base to represent motors and gearboxes, etc.
To make the eight barrelled pom-pom, use the same basic technique, but make the "receiver" from 0.08 x 0.04 strip. Make little pin marks for the guns and carefully stick the wires in. Because of the number of wires, this becomes a visually very difficult exercise. But it can be done! Been there, done that, breathed a deep sigh of relief when finished! If you think you can do it with narrower strip, say 0.07", try it.
For 20mm Oerlikons, I make the shields out of cardstock, cut into strips about 0.06" – 0.07" wide. Make a narrow slot in the end for the gun and glue the shield to a very fine strip of balsa or softwood such as pine. Cut to a length you find acceptable and glue to your model. When dry, attach the guns with white glue. Make the guns from 0.003 – 0.004" wire. It is very fine, but the result looks great and really in scale. Making the guns from larger diameter wire tends to make them look a bit "clunky", though this may fit right in with your commercial model’s 20mm.
For the four barrel .50 cal machine guns used by the Royal Navy, I use a plastic strip about 0.010" x 0.040", with the end beveled sharply and the "point" sanded or cut off. The guns are made form 0.010" plastic rod, cut to a length of about 0.06" and glued to the strip with tube glue. Note that the guns are on both sides of the central strip and are staggered. Find a good reference and you will see what I mean. This one is fairly easy.